


The Science of Great Yogurt
Our yogurt method is based on the principles in Harold McGee’s On Food and Cooking, and on the research by professors W.J. Lee and J. A. Lucey from University of Wisconsin-Madison on commercial yogurt making methods. These sources pointed out two important concepts for creating thick, creamy yogurt: holding milk at 195ºF / 90ºC for ten minutes before culturing, and allowing the yogurt to set at a lower temperature.
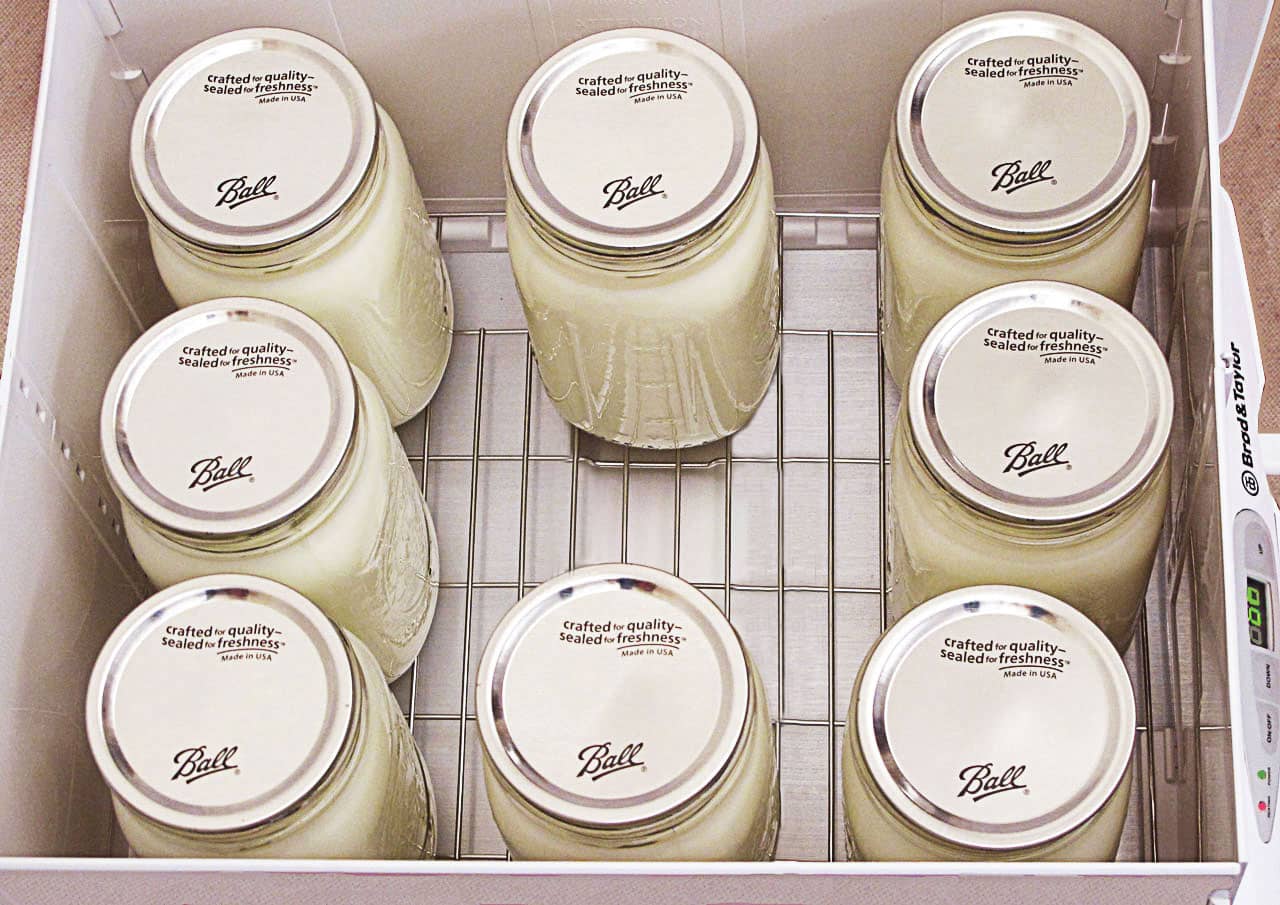
Note: When using the Folding Proofer to make yogurt, be certain there is no water in the water tray. The water tray is not needed for making yogurt. You can remove it from the Proofer, if you like, or leave it empty. But do not add water because it will affect temperature settings.
For a Thick, Custard-Style Yogurt, Choose a Higher Initial Milk Temperature. Standard methods for making yogurt call for the milk to be heated and cooled before culturing, and different temperatures create different styles of yogurt. Yogurt made from milk kept below 170ºF / 77ºC is thinner and tastes fresh, a little fruity and more tart, while yogurt made from milk held at 195ºF / 90ºC for 10 minutes is noticeably thicker and tastes less tart and somewhat creamy/nutty/eggy.
Protein is Key to Thickening. The more protein in milk, the thicker the yogurt. The casein (protein) clusters in milk thicken yogurt by unraveling and forming a three-dimensional mesh when exposed to the lactic acid created by culturing. Heating milk before culturing denatures one of the main whey proteins, lactoglobulin, which allows it to join in the mesh (instead of remaining inactive) and effectively increases the amount of protein in the milk that will be available to thicken the yogurt. The milk needs to be held at 195ºF / 90ºC for ten minutes to denature most of the lactoglobulin. A little evaporation during this heating also aids the thickening benefits of this procedure. When available, higher-protein, richer milks like Jersey or Guernsey make wonderful yogurt.

Lower Temperatures Give a Better Set. In addition to the quantity of protein available to form a mesh, the stability of that mesh is also important. That stability is determined by the temperature at which the protein mesh forms, i.e., the temperature of the yogurt when it sets. The yogurt will be smoother and more stable (less likely to leak whey) when it sets at a temperature below 104ºF / 40ºC. Being able to turn down the temperature during culturing is a key benefit of using the Proofer, a benefit which allows the smoothest, best texture to form (see texture comparison in photo of spoons, below).
Low Temperature Cultures can be Slow. Harold McGee points out that commercial yogurt is sometimes cultured at 86ºF / 30ºC, and that a lower culturing temperature ensures a smooth yogurt with less risk of whey separation. Higher temperatures and longer culturing times can cause a lumpy texture and excessive whey separation (similar to the spoon on right on the photo). We tested an 86ºF / 30ºC culture and found that it makes perfect, smooth yogurt. However, a temperature that low takes a very long time (12-18 hours) and made us a little uneasy about food safety.

High-Low yogurt method makes smoother yogurt (left spoon) than hot culturing (right spoon).
Our “High-Low” culturing method produces smooth, thick yogurt that is less likely to leak whey, yet is much more quick and safe than a low-temperature culture. We start the culture at 120ºF / 49ºC, a temperature that speeds the yogurt through the earlier stages of culturing. Then as culturing progresses and the rising acidity begins to inhibit any potentially problematic microbes, we turn down the Proofer to 86ºF / 30ºC. The method works well, and culturing takes just 2-4 hours, not 12.
Lowering the proofer temperature to 86ºF / 30ºC allows the milk to cool to 100ºF / 38ºC after about 3 hours. Either the Folding Proofer or the Sahara Dehydrator can be used to make yogurt using this method.
Which Culture? Our testing showed that store-bought yogurts are not all created equal- some made better starter cultures than others. While all the brands of “live culture” supermarket yogurt worked, some produced thinner textures while others made thicker textures. Yogurt cultures that included L. casei tended to have more viscosity and set up faster than those that didn’t. Some of our tasters loved the more viscous texture but some didn’t. A culture containing only the two classic yogurt microbes L. bulgaricus and S. thermophilus had very little viscosity. We also had the best luck with smaller (8 oz / 250 ml) containers. Even within the same brand, starter yogurt from 8 oz containers tended to produce smoother yogurts than larger economy tubs, possibly due to faster turnover and fresher cultures. It’s worthwhile to test a few different brands of yogurt until you find a favorite.
Sweeten after Chilling. If sweeteners are needed, we like to add them after the yogurt is set and chilled. We prefer not to add sugar before culturing to avoid feeding any undesirable bacteria. The beneficial lactic-acid producing flora are naturally well-equipped to feed on lactose, while other less desirable bacteria are not. Adding non-lactose sugars to the milk could feed any undesirable bacteria that accidentally end up in the milk through equipment or inadequate heating. As the culture progresses these will be inhibited by lactic acid, but we prefer to avoid growing undesirable bacteria on non-lactose sugars during the early stages of culturing. Honey, due to its anti-bacterial qualities, can slow down culturing and so is best added just before eating.
Frequently Asked Questions


Leave a comment
53 comments
Thanks so much for your information. It was so clear and detailed. I have one additional question. With the protein becoming more usable as we heat the milk (the mesh I believe you called it), is this what accounts for the increase in protein on the nutritional info. I make greek style yogurt at home and have always wondered how there could be more protein per serving than in the milk itself that was used to make it. Thanks for the explanation.
The reason that Greek-Style yogurt has more protein is because the proteins become more concentrated when the whey is removed. So the same amount of Greek-Style yogurt has more protein than an equivalent amount of yogurt that has not been strained.
I can’t get the milk above 180 degrees in my double boiler, which I use to avoid scorching the milk. If I hold the milk at 180 for half an hour, does it have the same effect as 10 mins at 195?
Heating the milk before culturing determines part of the flavor and how thick the yogurt will be. If you just heat the milk to 165F briefly and then cool, the yogurt will taste fresh, a little fruity, and will be thinner and more tart when it sets. We have not tried 180F for one half hour so we can not say for sure whether that will work but have doubt. If you heat the milk to 195F and hold it there for ten minutes, the yogurt will be milder and thicker when it sets, and will have a bit more of a cooked milk taste. Holding the milk at 195F for ten minutes is certainly optional. It helps produce a thicker and slightly milder yogurt. The process at 195F denatures whey proteins, allowing them to contribute to the solidification of the yogurt. And with the extra protein the yogurt sets a little earlier in the culturing process, so that the flavor can be mild, or the yogurt can culture longer if more tartness is desired. Hope this answers your question and best of luck with your yogurt making.
Which nutrition like cholestrol,fatty acid thymin ,protein or any thing which by adding in yougurt make yogurt more thick Despite using skimmed milk powder
Yogurt that lumps or leaks whey is often caused by culturing too hot or too long. To prevent lumpy yogurt hold the milk above 195°F / 91°C for ten minutes before cooling and culturing. Yogurt starter cultures containing Lactobacillus Casei generally result in thicker smooth yogurt. Milk with a higher protein content can also develop a thicker yogurt. Both of these steps will help yogurt utilize more of the whey proteins in milk for thickening and stabilizing the texture. Brod & Taylor Custard-Style “High-Low” culturing method produces smooth, thick yogurt less likely to leak whey, and takes less time than most other methods. For more info, view our Custard Style Yogurt Recipe
Any thoughts on how to incorporate Lactobacillus reuteri into a yogurt?
Brett, This is a very good question. We are not certain where you can purchase a starter to introduce Lactobacillus reuteri into homemade yogurt. We have read that when this bacteria is introduced it will likely result in a more sour yogurt and can produce a more slimy consistency. Stoneyfield Farms, one company which produces a variety of yogurts, used to include Lactobacillus reuteri in their yogurt products but we read that they eliminated this particular bacteria due to customer dissatisfaction with the sour taste. We have not found another source for you but if we find any further information we will follow up with you.
L. reuteri is included in Nature’s Way, Primadophilus, Reuteri Superior Probiotic powder. It includes Lactobacillus reuteri, L. acidophilus, Bifidobacterium longum, L. rhamnosus. I use that powder as a starter culture. It takes longer than using yougurt as a starter culture. You can use other L. reuteri pill or powder as a starter culture. The resulting yogurt tastes best at not too thick stage, later it starts to get thicker and sour and even later it tends to get from sour to bitter and the whey starts to separate. I find it best when it just starts to be litle sour. I also found that if I add prebiotic powder to the mix (fructooligosacharides and inulin) it takes longer to get acidic and it is sweeter and may be slightly thicker.
Hello. Thank you for the very informative site. I am wondering why, as you say, yogurt ferment with lactobacillus casei turns out thicker. I have noticed this myself in my own yogurt making and am trying to research what characteristics of l. casei cause this effect. Thank you for any further insight you can provide.
This is a very good question. Through our testing years ago, we noticed our yogurt starter cultures containing Lactobacillus Casei bacterium generally resulted in a thicker and more smooth yogurt. This could in part result from this particular species of Lactobacillus documented to have a wide pH and temperature range. Milk with a higher protein content can also develop a thicker yogurt. Both of these steps help yogurt utilize more of the whey proteins in milk for thickening and stabilizing the texture. Heating the milk before culturing also determines how thick the yogurt will be. If you just heat the milk to 165°F briefly and then cool, the yogurt will be thinner and more tart when it sets. If you heat the milk to 195°F and hold it there for ten minutes, the yogurt will be milder and thicker when it sets. The process at 195°F denatures whey proteins in the milk, allowing them to contribute to the solidification of the yogurt. For further information regarding L. casei bacterium you can find Harold McGee’s On Food and Cooking and also W.J. Lee and J. A. Lucey’s research on yogurt making methods. All the best to you in yogurt making!
Congratulation for the article! Very interesting method! I have a small question…after the hour at 195 ºF / 90 ºC, switching the Proofer to 86 ºF / 30 ºC temperature setpoint, how long does it really take for the yogurt to reach the lower temperature (86 ºF / 30 ºC)? I mean, since the Proofer doesn’t look like having a refrigerating function, just switching off the heating it should take quite a long time in normal environmental temperature (maybe 1-2 hours or more). So, practically, considering 2 hours total colturing time, the real culturing temperature, after the first hour, is a slow decreasing from 195°F to 86°F (maybe not even reaching 86°F). Thank you in advanced, Alberto.
Alberto First a clarification. The 195F treatment of the milk is BEFORE adding the yogurt starter. This high temperature will denature the milk proteins and create a thicker custard style yogurt. The starter is added only when the temperature cools to 115F to avoid killing the active yogurt cultures. Regarding the switch to 86F after one hour at 115F: You are completely correct that the proofer has no cooling function. Following this method, the temperature of the culture will drift slowly downwards. We have made measurements to understand that after about 2-3 hours, the temperature will be about 100F. This is significant because if the temperature of the yogurt is above 100F at the time the yogurt “solidifies” there is a much greater chance that the yogurt will form lumps or leak whey. This is not to say that all cultures will become lumpy at higher culturing temperatures, but in our experience this method is virtually foolproof with any yogurt culture or milk. The consistency of the yogurt is extremely smooth. Thanks for a very good question!
Thanks a lot for your reply and apolgize for the mistake (I meant to write 120F of course , and not 195F… sorry, but I am not familiar with the Fahrenheit scale). All clear now! All the best, Alberto
I’ve been making L Reuterii + L Rhamsnous yogurt for some time now. I used a “femdophilus” capsule I open and tip out. The first whey I collect seems to have a these 2 in it but past that its not useable. I filter the yogurt and get almost 3X the whey to actual yogurt which is about the consistency of Mozarella. I have at times introduced the starter in too warm a milk. I once had it break immediately. But many times I end up with a very tart and slightly bitter even though there is no burn or other problem. Takes 2 days to set because I only warm it 1 time. I also never check temperature. Is there a bad effect that can happen if I get it too warm, put in the whey and let it ferment 2 days. I like the cheese like texture. I also use 1% milk – because I get lots of it and no one else in my family will eat/drink it.
Well Done, Keep it up.
Most of papers said the optim incubation temp is around 40c, but why you recommend at 30c? What is the scientific based evidence behind this?
Angel – All our yogurts recipes were created using Lactobacillus bacteria. Although it can tolerate higher temperatures, it will create a better texture at the lower setting. Different strands and blends of bacteria will have different optimum temperatures, but we’ve found our recommended temperatures produce the best results from this recipe.
I never comment on internet articles but this was FABULOUS. I mean, for a fermentation nerd. No obnoxious ads, decent scientific process and great explanations, and no dramatic life story to weed through. Thanks!
Christy – Thanks for the feedback! It’s great to hear you enjoyed the post and we really appreciate the comments!
Please explain the process of French style yogurt, that is set in individual terra-cotta pots or small glass jars. I love the lighter texture and the firm set but do not know how to achieve.
This is great information. My yogurt has always been a bit runny and lumpy so this is great info. I’m a bit confused about the temperature though. Virtually all other websites say to keep the temperature between 105°F and 112°F. This includes academic sites. They say that if the temperature is lower, the bacteria won’t multiply. And if it’s too high, the bacteria die. According to those guidelines, 120°F will kill the culture. And if any survive, they’ll just lay dormant at 86°F. What am I missing? Thanks for any help.
How long do you leave the culture @ 120F (49C) before you reset the temp to below 100F and let it coast down? Also, since L Caseii has the highest temperature survival range of the yogurt culture mix, your high/ low method may select for it over the others and also help make the results creamier as well. Thanks for sharing this innovative info with the rest of us!
Mark – Leave the yogurt at 120F for one hour, and then lower the temperature. The yogurt will take an additional 3 hours after the temperature is lowered, but timing can vary, so we recommend checking and leaving the yogurt to culture longer if necessary.
Thank you for your enlightenment. I am using powdered milk. Wandering does it make sense to follow the High Low concept to get a creamy and low whey yoghurt.
Hi, we do not have experience making yogurt from powdered milk. You can try starting with the high-low method and then adjusting if the results are not satisfactory. Let us know if you give it a go
Started making lactose free yogurt for my wife with the Sahara Dehydrator. Lactose free yogurt is all we make now. It is super creamy and easy to make. It even turns out good with 1% milk. While it is not quite as thick as greek yogurt it is close enough. This will easily pay for the dehydrator with the savings from not having to buy yogurt. We just keep it covered for ten minutes on the counter after it reaches 200 degrees we do not hold the temp. It has worked for us so far and seems easier. Whisk it every 4 minutes and 30 seconds. We and add 5.3 ounces of plain yogurt because that is the new shrinkflation size and mix it in at 114 degrees. It turns out perfect every time. Cultures we use S. Thermophilus, L. Bulgaricus, L. Acidophilus, Bifidus, L. Casei. It is a store brand but same ingredients as a name brand. Thanks for posting the lactose free recipe.
Fred – Thank you for sharing your success with our lactose-free yogurt recipe and your use of the Sahara Dehydrator. We’re thrilled our recipe could be part of your kitchen routine!
Do you have a recommendation for making yogurt from raw milk? Can we make the yogurt without the high heat process?
Ercell- Sorry, we do not have any experience with making yogurt from raw milk so we cannot provide any recommendations.
I have a few questions, you don’t really talk about culturing times, what metrics do you use to know if the yogurt is “done” after only x amount of hours vs x amount of hours for a different time? Secondly, I know this article (great info thanks) is only about taste and yogurt consistanty but what about health and bio reasons? I.e. the longer you culture the yogurt the higher amount of probotics it has? (This is obviously to a point as I believe 24 hours above theres no lactose left and nothing for bacteria to feed on) Thirdly, is whey seperation that important if you are making greek yogurt and just using a strainer?
Sam – Thank you for your comment and thoughtful questions! We’re glad you found the article informative. Yogurt is typically “done” when it reaches the desired consistency and tanginess, usually within 6-12 hours. This varies based on the bacteria strain and culturing temperature. You can test for doneness by tasting a small spoonful to see if it meets your preference. For more specifics, check our other yogurt recipes on the website. You’re right that longer culturing increases probiotic content, but it is important to find a balance because, at a certain point, the texture and flavor might be negatively affected. When making Greek yogurt, straining will achieve a creamier, thicker product. It’s not necessarily essential to see a lot of separation before straining because it will occur as it sits in the strainer. Our Greek Yogurt recipe on our website has more details. I hope this answers your questions!
Very helpful article. Two questions I have concerning the time and temperature after adding culture. I have added culture when milk has cooled to 110-115. I held temp between 110-115 for 4 hours. If was thick and very good. Question is do I need to hold it or let it gradually cool. OR can I add culture after reaching 115 cover and sit out on the counter 24-?? hours. Thank you!!
Nancy – Glad you found it helpful! It sounds like you had success when you held the temperature between 110-115°F for 4 hours. You can just stick with that method, or if you like to experiment, you can try either of the methods you suggested. Making yogurt is flexible, and a lot of it has to do with personal preference. Letting it sit on the counter for 24 hours will likely produce a very tangy yogurt, but again, it is a personal taster. We like to add the culture when the milk is 120°F, and then hold it there for 1 hour. After that, lower the heat, and continue to culture for about 3-4 hours. During this time the milk will cool to about 100ºF. We have been pleased with the results following those times and temperatures, but both yogurt cultures and taste vary so just experiment until you find what you like best.
Can i add Skimmed milk powder in my Yoghurt to boost Protein Content and Thicken Yoghurt for cheesecake feel?
Manisha – Yes, you can add skim milk powder to yogurt to thicken it and increase its protein content. The general recommendation is for about 1/3 cup of milk powder for every quart of milk.
My wife was making yogurt for me – I usually do it. I told her to add a couple of spoonfuls of innulin, which I usually do. She used the wrong tub and added a couple of spoonfuls of MCT powder by mistake. Excellent result, very creamy and even more keto friendly.
Robert – That sounds like a happy accident! Glad it worked out so well. Thanks for sharing your discovery with us :)
Fascinating insights into the science of yogurt! Your explanations on cultures, temperature, and fermentation techniques are truly enlightening.
sbrewing company – So glad you found it helpful! Happy fermenting :)
What causes yogurt to get “stringy or stretchy?” I have been making yogurt for years and most times it turns out beautifully. Other times it will turn out stringy or stretchy after it has set and cooled and been refrigerated. What causes this?
Char – Stringy or stretchy yogurt can happen for a few reasons. One common cause is wild yeast or unwanted bacteria contaminating the milk during the yogurt-making process. This can happen due to improper heating of the milk before culturing, using an old or contaminated starter, or even slight hygiene issues with equipment. Another factor could be the bacterial strains in your starter culture—some strains, like Lactobacillus helveticus, produce exopolysaccharides that create a more gel-like or elastic texture. If you’re using the same starter each time but getting inconsistent results, temperature fluctuations during fermentation could be playing a role. Here are a few things that may help prevent stringy yogurt: Use a fresh, high-quality yogurt starter, heat the milk to at least 180°F (82°C) before cooling and adding the starter, keep incubation temperatures stable, and avoid over-fermenting, and maintain good hygiene by thoroughly cleaning all utensils and containers used in the process. Let us know if you have any other questions—happy yogurt-making! 😊
Hi just a quick question, is there a way to fix lumpy yoghurt? Thank you.
Luwi. - Lumpy yogurt is often caused by culturing at too high a temperature or for too long. To fix it, you can whisk it vigorously to smooth it out—though this will thin the texture. If you prefer a thicker consistency, try straining it: line a large colander with cheesecloth, a clean towel, or a restaurant-sized coffee filter and place it over a bowl. Spoon in the yogurt, cover, and refrigerate to drain. Empty the whey from the bowl as needed. We like Greek-style yogurt best when strained for 3–4 hours, but you can adjust the time to your preference. To prevent lumps in the future, holding the milk above 195°F (91°C) for ten minutes before cooling and adding your starter can help. Using a starter culture with Lactobacillus casei or milk with higher protein content can also result in a smoother, thicker yogurt. Our Custard-Style ‘High-Low’ culturing method is another great way to achieve consistently smooth results. Hope that helps—happy yogurt-making! 😊
Thank you for this comprehensive explanation. I panicked because I boiled my milk for about 10 seconds. I’m not too surprised it’s not a critical failure, though. I have yet to botch a batch of yogurt. And, honestly, it doesn’t seem to matter too much what I do. All my yogurt turns out awesome. In fact, I live in the Phillipines, where the average temerature is definitely under 85F, especially at night (which is when I always cure my yogurt). So, I can make the milk too hot, add culture hot or cold, ferment at any temp over 78F, and even only cure it for 4-6 hours if I’m in a hurry. I can also use anywhere from a teaspoon to a cup of starter. It all works. I highly recommend anyone who hasn’t tried it to heat up some milk, add some yogurt, stick it some place warm . . . ish, and watch the magic happen.
Sean – Thanks for sharing your experience! It’s great to hear that your yogurt-making routine is so versatile and successful. You’re right—yogurt can be surprisingly forgiving, especially when you get a feel for it. Your approach shows that a bit of experimentation can go a long way. Happy fermenting!
Hi, there’s some mistakes. you say, “Lowering the proofer temperature to 86 ºF allows the milk to cool to 100 ºF after about 3 hours.” That makes no sense and you haven’t included Centigrade here like with the rest of the page. I know you’ve already said that 86F is 30C but the other bitter is obviously a mistake. Thanks.
Jim – Thanks so much for your comment, Jim! You’re right that it could be a bit confusing at first glance. What’s happening is that after lowering the Proofer from 120 ºF (49 ºC) to 86 ºF (30 ºC), the milk doesn’t drop instantly—it gradually cools, and after about 3 hours it’s around 100 ºF (38 ºC). We’ll make sure the missing Celsius is added—really appreciate you pointing that out!
thank you! you know something is well written and useful when your internet-reduced-to-about-5-minute-attention-span stays absorbed until you complete the entire study and you are inspired to share on social media. one thing I am curious about is whether or not the amount of starter used affects consistency and what is the ideal amount of starter to milk by percentage for best yogurt.
I have had great success making the custard style yogurt in a single layer in the proofer, eight jars total. I bought the accessory rack and want to do another eight jars on top. Will the recipe work and set the upper rack jars?
Kathy L, thanks for the comment. Unfortunately I would not suggest using the accessory rack, or any rack for that matter, to make yogurt. When using the Folding Proofer in “Slow Cook” mode, we suggest placing the yogurt or pot directly on the base metal plate in order to be closest to the heating element. I apologize that some of our photos online contradict that advice. If using the accessory shelf, I worry the yogurt would not reach the correct temps since it will be too far from the heating element. Best of luck!
During the initial heating of the milk up to 195, does it matter how quickly the milk rises to that temperature? I’ve heard it’s better to slowly raise the temperature, but I would think that the more important part would be reaching the proper temperature and holding for 10 minutes.
Ron Wood, The rate of heating isn’t critical — what matters is reaching 195°F and holding it there for 10 minutes. That hold time is what denatures the whey proteins and gives you a thicker, creamier result. That being said, if you heat it quickly you have a higher likelihood of scorching the bottom of the pot. Heat it however is most convenient for you!