


Tips for Getting the Most out of Your Proofer
The Folding Proofer & Slow Cooker allows you to control the environment for more consistent & reliable results. Whether you're proofing dough (letting it rise), making homemade yogurt, or cooking your favorite slow-cook meal, with the Folding Proofer, you’ll be able to create the ideal environment for whatever your needs and enjoy successful results every time.
You may have a few questions as you begin using your Proofer, but don't worry; we've got you covered. Below, we answer some common questions and provide tips to help you get the best results from your Proofer.
Want to skip the reading? Watch our video explanation instead.
Proofer Temperature
The first question you might have is, “What temperature should I set the proofer at for proofing my dough?” Temperature can profoundly affect fermentation (the rate at which your dough rises). A recipe may have proofing temperature guidelines, but if it does not, 78 to 82°F (25 to 28°C) degrees is a good range for most dough. Temperature also can affect the level of sourness in sourdough. The Proofer’s degree-by-degree temperature control allows you to select the perfect temperature for your dough and your needs.
Checking Dough Temperature
When you first turn your Proofer on, a red indicator light indicates the base plate is heating up. When the green light comes on, the base plate has reached its temperature – this does not indicate that the contents within the proofer have come to the set temperature.
Many bakers like to check the temperature of their dough during fermentation. Using a digital probe thermometer to check your dough is the most accurate and reliable way to get the internal temperature of the dough. Do not lay the thermometer on the bottom rack or use an indoor thermometer inside the proofer. These methods are much less accurate and will not provide a reading of the actual dough temperature.

Water Tray

Providing a warm, humid environment for your proofing dough will ensure a better rise, resulting in better bread. We recommend using the water tray when proofing bread doughs for two reasons. One, the water tray provides humidity within the proofing chamber, which prevents your dough from drying out as it rises. Two, the Proofer has been calibrated with the water tray in use. Therefore, the set temperature will most accurately represent the dough temperature if the water tray is used. If you choose not to use the water tray, be aware that your dough temperature may be a few degrees lower than the set temperature.
Proofing Container and Covering
What type of bowl should I use to proof my dough? We recommend using a stainless steel bowl for proofing your dough, but any bowl will work. Keep in mind that if you use a thick bowl, or a bowl much larger than the amount of dough it contains, it will take longer to heat, and your dough may never reach the set temperature.
In most cases, there is no need to cover the bowl because the water tray will provide humidity, preventing the dough from drying. However, if you're in a particularly dry climate or your dough has a long fermentation, you may want to lightly cover the bowl in order to help prevent skin from forming.


Covering the dough will have another effect. It will increase the temperature by a few degrees, and this is useful if you're working with cooler dough and want your dough to come to the set temperature faster.
Covering with aluminum foil is the most effective for raising the temperature quickly, but plastic or a tea towel can also be used. If you're using this technique to warm your dough faster, just remember to remove the cover after 20 to 30 minutes so the dough doesn't overheat.

Factors Affecting the Dough Temperature in the Proofer
- Water tray: not using the water tray can result in the dough being a few degrees lower than the set temperature
- Covering the proofing container: covering will raise the temperature of the dough by a few degrees
Radiant Heat

The Proofer works through radiant heat. The aluminum base plate heats up, warming the bowl above, which heats the contents within the bowl. The thermostat of the Proofer controls the temperature of the aluminum base plate. The temperature of the base plate has been calibrated to bring your dough to the temperature you've selected. Proofing temperatures are above room temperature but below body temperature. As a result, putting your hand in the Proofer might not feel as warm as you expect. The Proofer was designed to heat the objects above the warming plate through the radiant heat, not by just warming the air.
Because of how the Proofer is designed to work, there is no need for thick insulated walls. The thin and collapsible walls make the Proofer easy to store but provide enough heat retention to keep your dough at the right temperature.
Check to see if Proofer is working:
If you doubt that the Proofer is operating correctly, there is an easy way to check: turn off the Proofer, remove the rack and water tray, and leave it off for a few minutes. Then, turn it back to about 80 to 85°F (27 to 29°C) degrees and place your hand directly on the aluminum plate. Within 10 to 15 seconds, you should feel it becoming warm.
Slow Cooking Mode
The Proofer has two modes: proofing mode and slow cooking mode. Use proofing mode when working with dough, and slow cooking mode for slow cooker recipes. These modes work differently, with the most significant difference being that the rack is removed in slow cook mode, and a pot is placed directly onto the aluminum plate.

Slow Cooking Mode

Proofing Mode
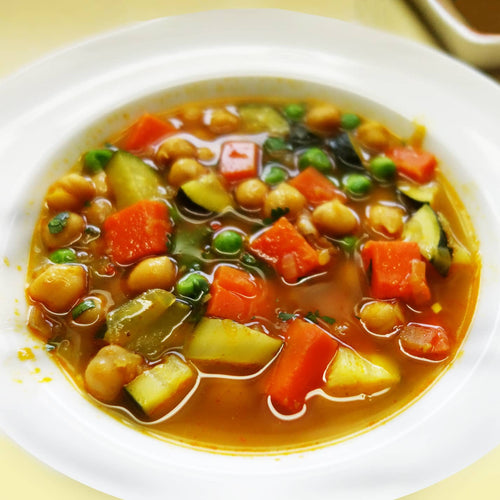
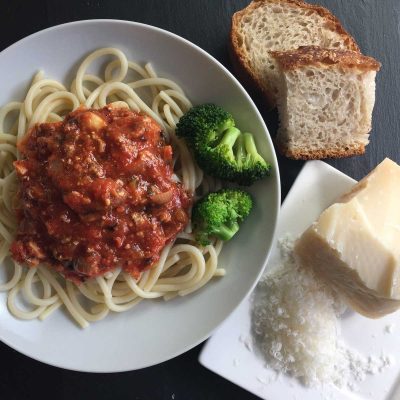
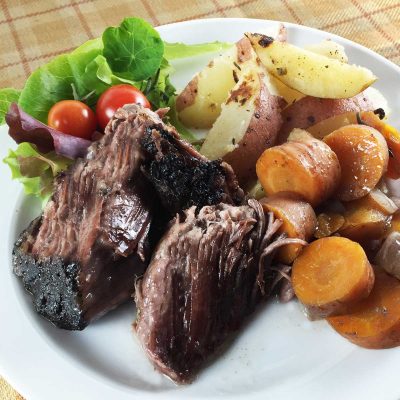
One of the advantages of using the Proofer in slow cook mode is that it allows for one-pot cooking, making meal preparation more convenient. Instead of transferring food from the stove to the slow cooker after sautéing or searing, the Proofer enables users to do all the cooking in one pot. After sautéing or searing on the stove, the hot pan can be placed directly on the Proofer's pre-heated heating plate and covered with a lid, resulting in fewer dishes to clean.
We have some great slow cooker recipes that rely on this cooking method, including Vegetarian Curried Chickpea Soup, Italian Meat Sauce, and Hearty Chuck Roast:


Leave a comment
12 comments
Can the proofer/slow cooker be used for baking?
Victoria – No, it cannot be used to bake bread.
How long does it take to proof 2 loaves of bread?
Rhonda – It depends on the dough and the temperature. Most recipes will give a specific time for proofing. We suggest a temperature of 80F. For most yeasted doughs, the first rise will take 1-2 hours and the second rise will take about 1-1.5 hours.
Can you store your starter in the proofer box? I’d like to store it in the box the night before I make the dough.
Rebecca – Yes, you can absolutely store your sourdough starter in the Folding Proofer. If you need a warm environment to store your starter overnight, the proofer works perfectly. Many of our customers use it in this manner.
Can proofer be used as a dehydrator?
Wanda- We do not recommend using the Proofer to dehydrate. One of the key components of a dehydrator is air circulation. The Proofer does not have a fan and does not work effectively as a dehydrator.
Does this proof donuts to taste like commercial donuts you buy from the donut shops?
When I check the temp of my dough with my thermapen digital thermometer, the middle of the dough is always a few degrees cooler than the bottom. Which temp reading should I follow during bulk fermentation? I use a stainless steel bowl.
Bryan, great question! Proofing is just one step in the donut-making process. It’s where the shaped donuts rest and rise before frying or baking. The proofer creates the ideal warm, humid environment for that rise, which gives you light, airy donuts with a great texture. That said, the final flavor and texture of your donuts will depend on your recipe: the dough, frying oil, glaze, and so on. Many home bakers find that a well-proofed homemade donut actually surpasses what you’d get from a shop! If you’re after that classic glazed donut shop flavor, look for a recipe that uses a yeasted dough and a light glaze, and the proofer will help you nail the texture every time.
LIZ, thanks for your comment. What you are experiencing is perfectly normal. The heating element for the Fold Proofer is in the center of the base. You can try off-setting your bowl from the center if the bottom of your dough is too warm. Also, folding helps redistribute any heat throughout the mass. In order to get the most accurate temperature, we suggest either: (a) taking an average of the temperatures throughout the dough or (b) using the temperature in the center of the mass of dough.