


How To Level Up Your Lamination: Our Tips for Flaky Perfection
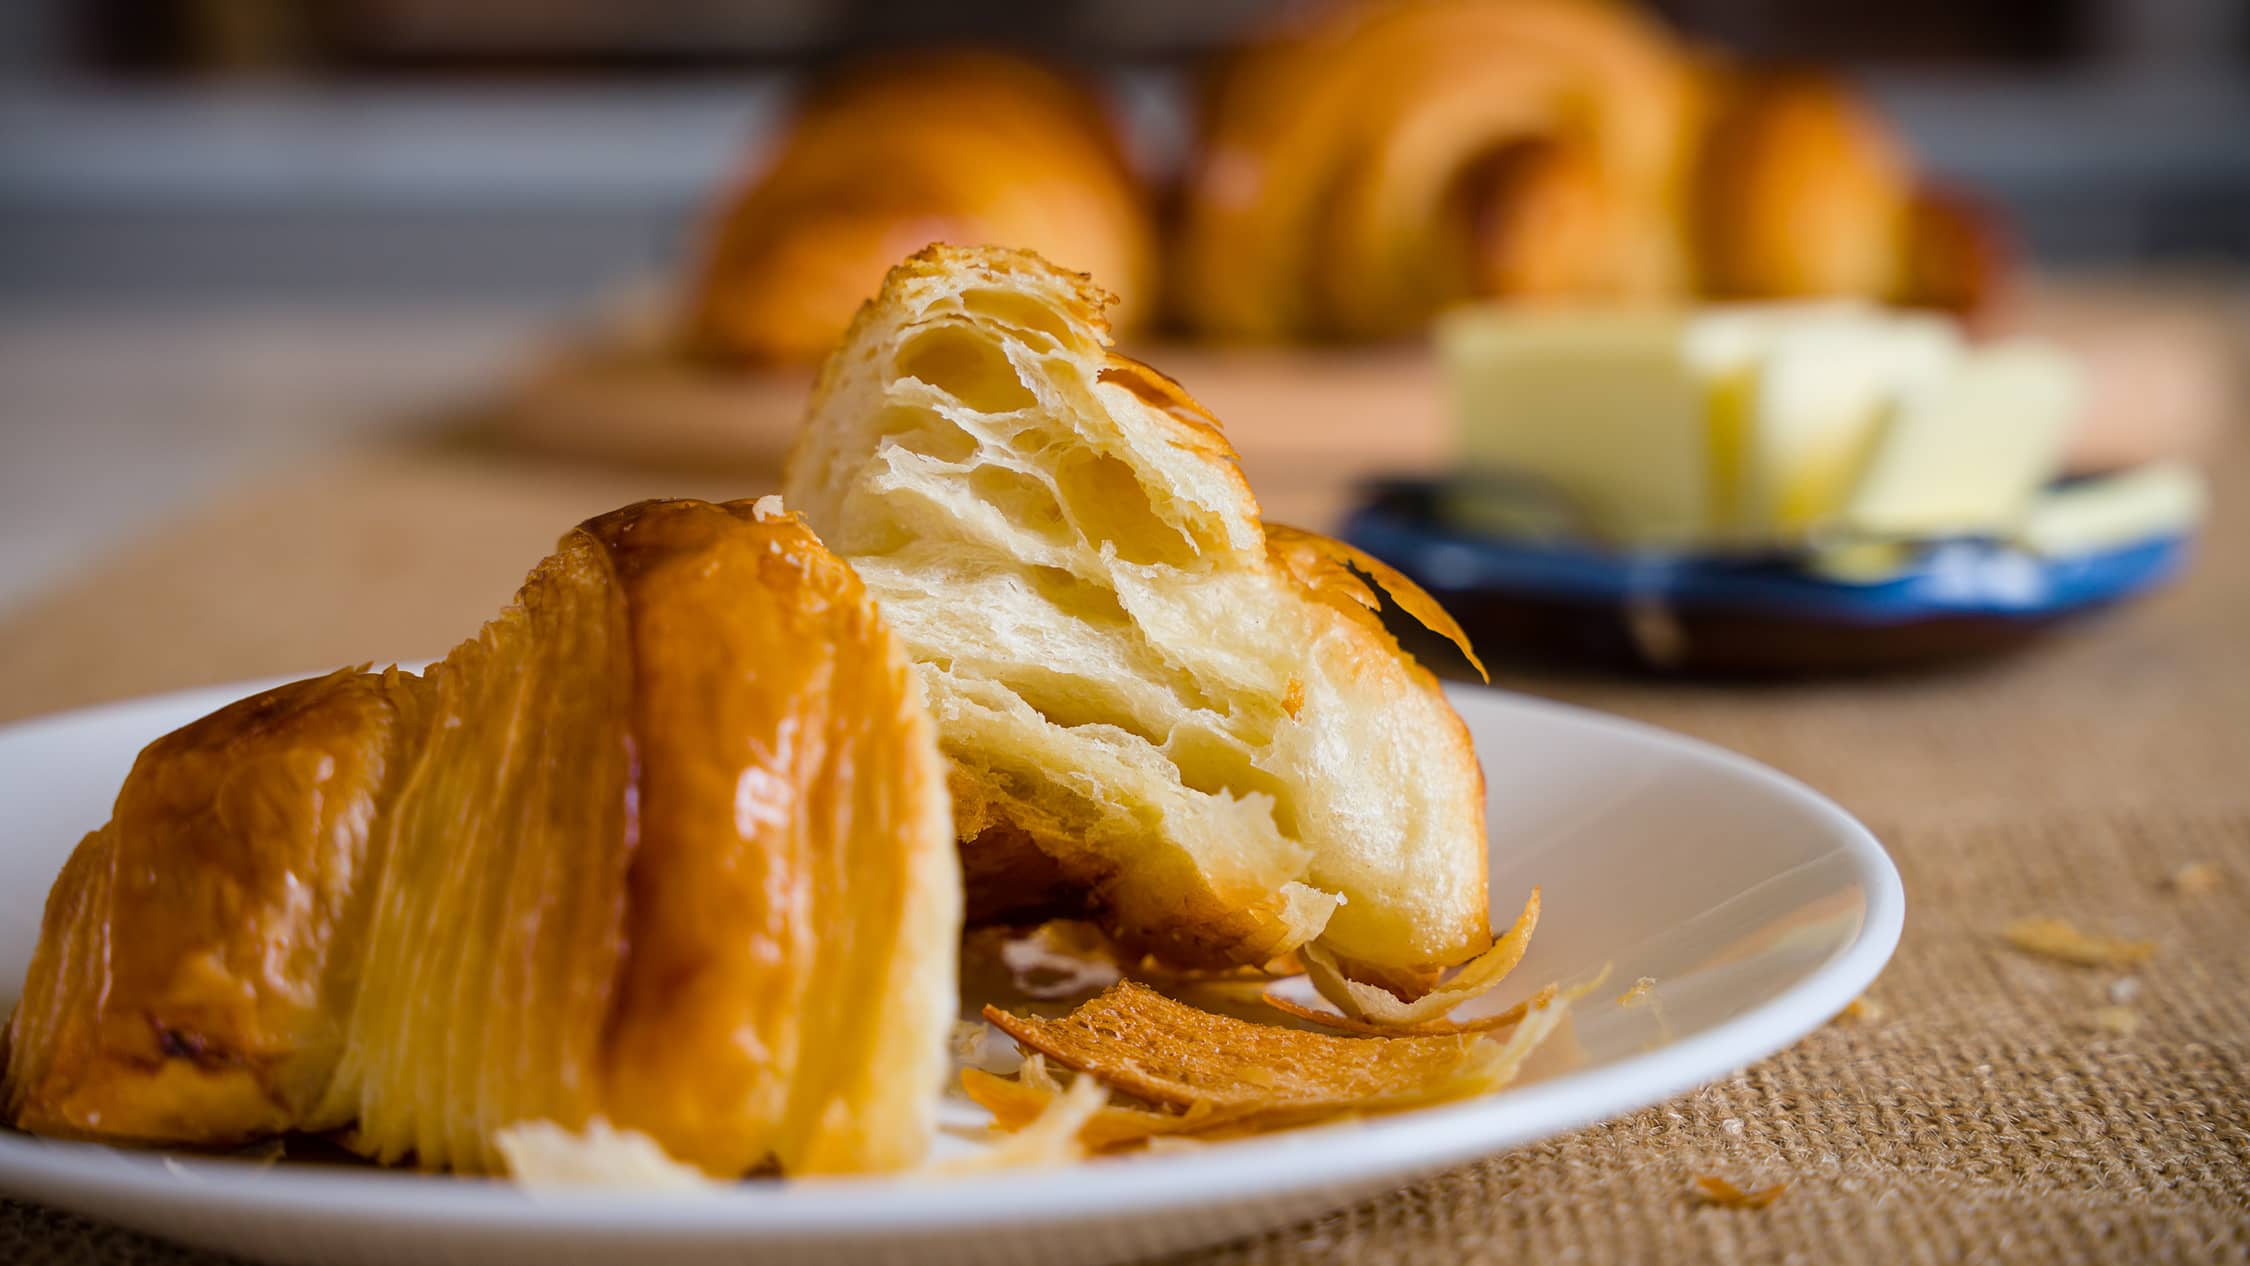
Crafting homemade croissants and cruffins is both a delightful challenge and a rewarding project for bakers. The key to their irresistible flakiness lies in mastering lamination, a technique that requires patience, precision, and the right approach. If you're new to the concept of lamination or need a refresher, consider starting with our article, “What is Laminated Dough?” before diving deeper into this article. This guide focuses on essential tips to elevate your lamination game, guiding you toward achieving the dreamy layers that make for the perfect pastry.

Useful Tools for Lamination Success
While you can laminate without these tools, we find the tools below to make the process much easier and consistent.
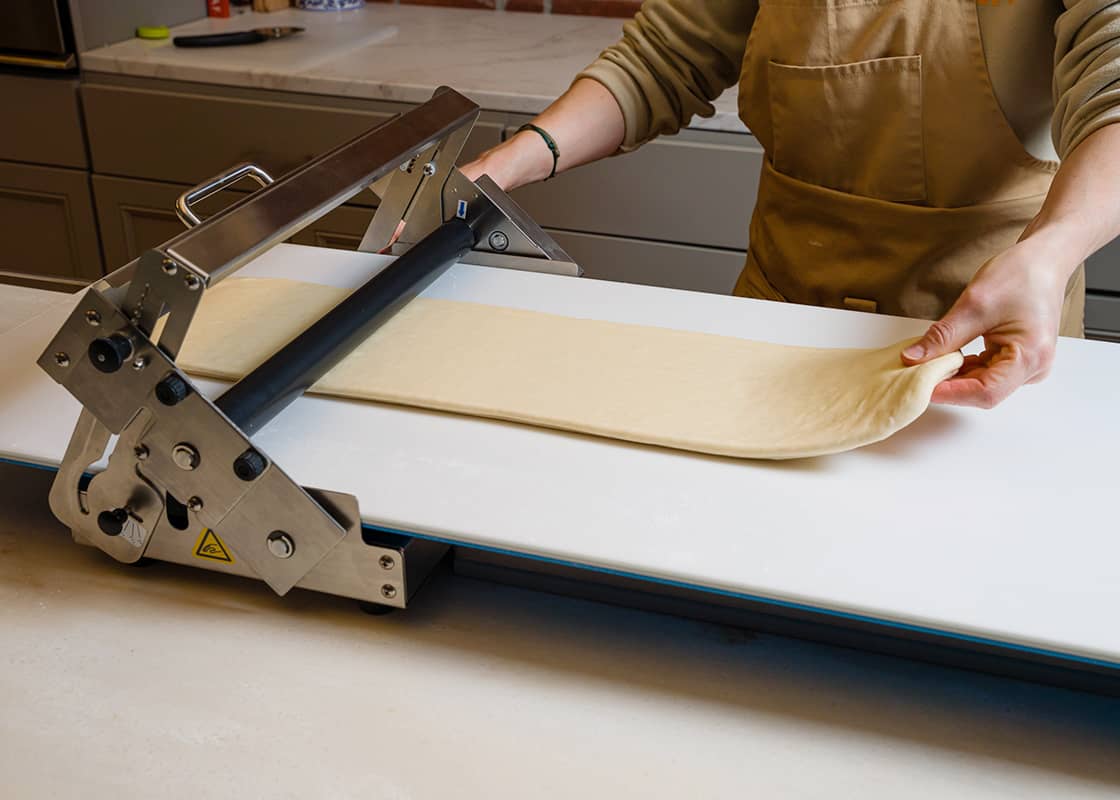
Dough Sheeter:
If you have ever made laminated dough by hand, you understand it can be challenging and labor-intensive. A dough sheeter not only saves precious time and effort but also ensures consistent thickness and precise layers, which are crucial for perfect pastry. Moreover, it helps keep the dough cool, which is essential to prevent butter from melting into the dough, resulting in more pronounced layers, more volume, and a flakier pastry.
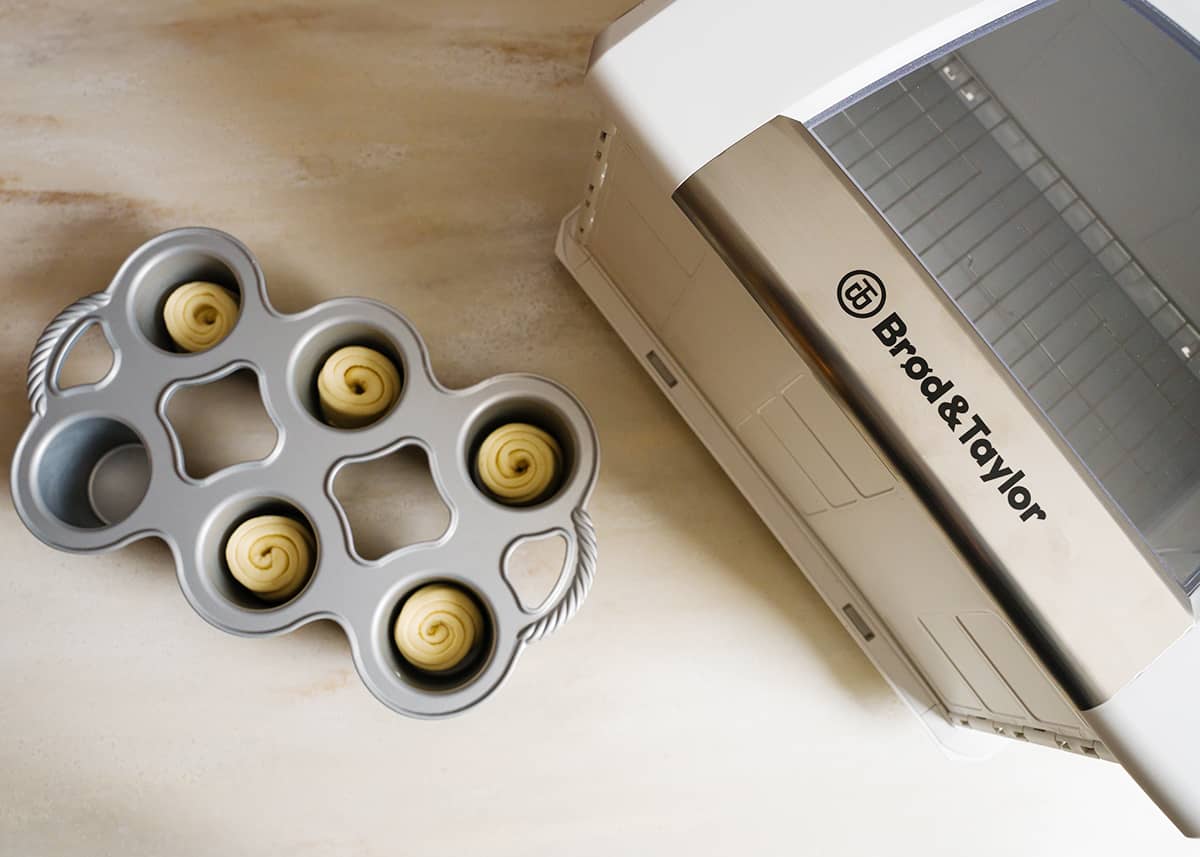
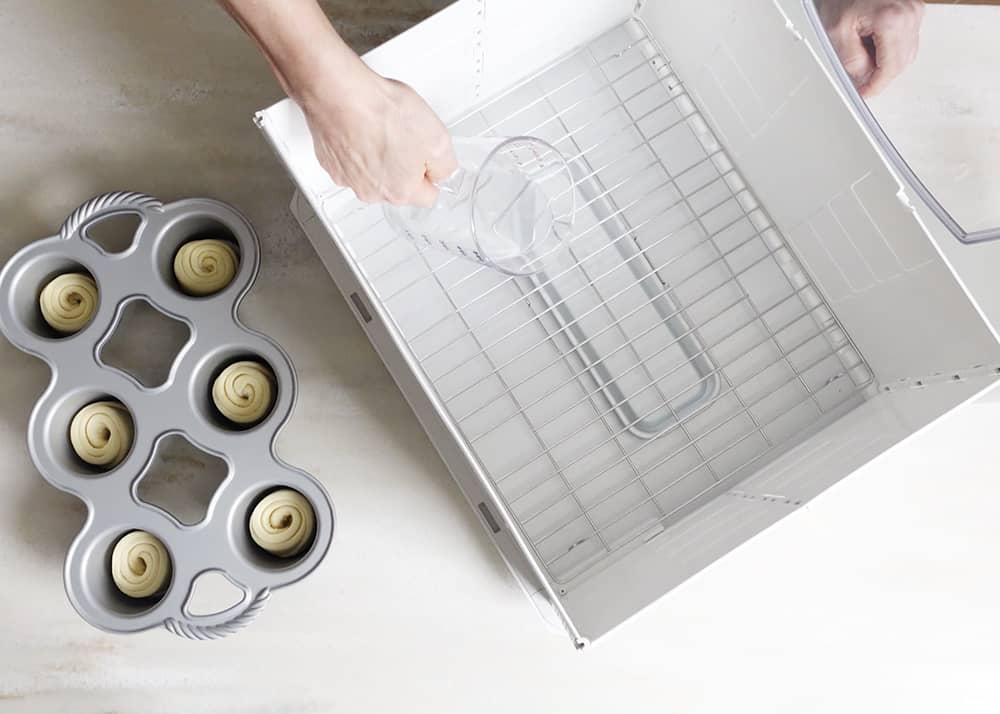
Folding Proofer:
Most, but not all, laminated doughs are leavened. If your dough contains yeast or sourdough starter, it will need time to rise before baking. Laminated dough needs to be proofed at a warm enough temperature to keep fermentation moving along but not so warm that the butter will melt. We recommend using a temperature-controlled environment like the Folding Proofer, which can provide both a warm and humid environment for proofing croissants. The accessory shelf is useful as it provides extra space for another tray of pastries.
Additional helpful tools
- Ruler: Precision is important in pastry making. A ruler not only assists in achieving accurate dimensions during rolling and cutting but also doubles as a straightedge when cutting.
- Pastry Brush: An indispensable, multi-functional tool, the pastry brush is perfect for dusting off excess flour during lamination and for applying egg wash to pastries pre-baking. Opt for a soft-bristled brush to gently handle the delicate layers without causing damage
- Sharpe Knife or Pastry Wheel: A well-maintained sharp knife or pastry wheel will deliver clean cuts without compressing the dough. If your knife is dull, consider using a knife sharpener for best results.
- Thermometer: Managing dough temperature is vital for success. An infrared temperature gun can help monitor your temperature accurately.
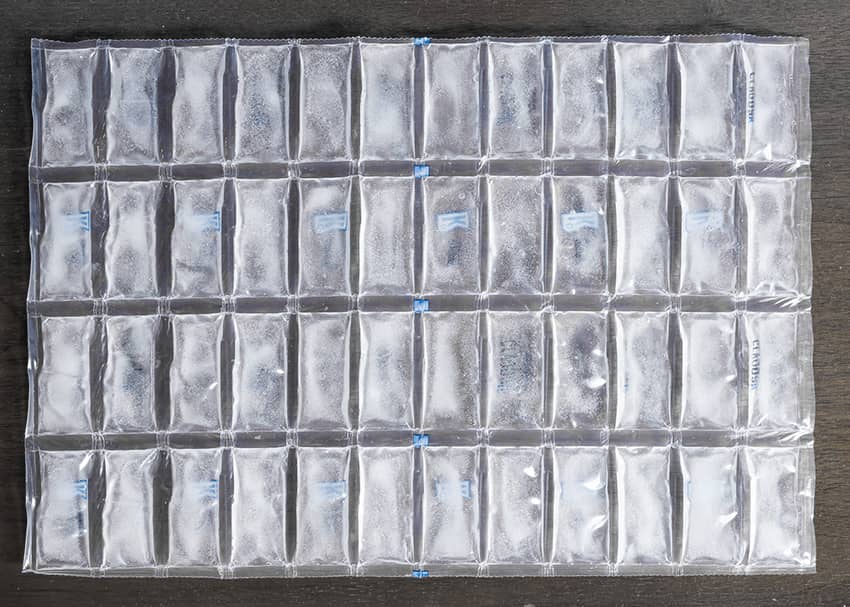
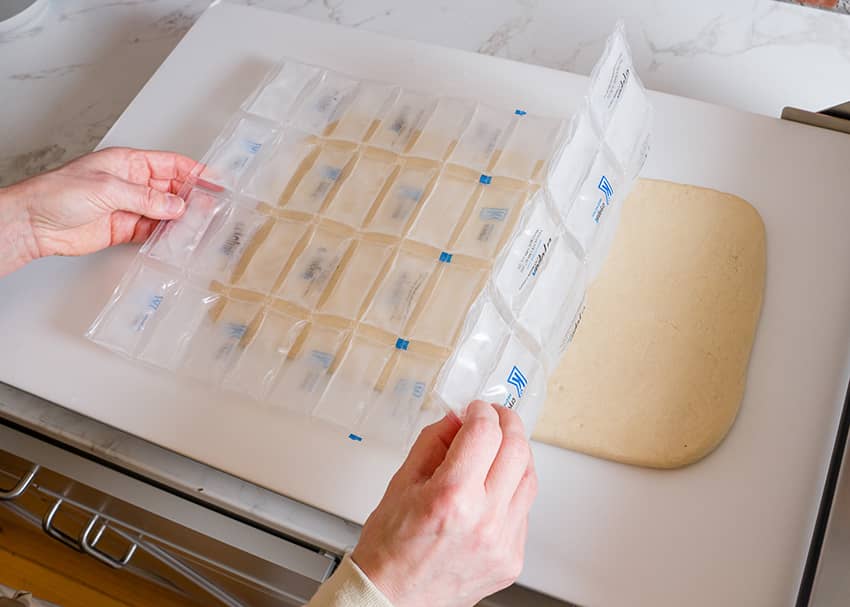
- Ice blankets: Keeping dough cool is important to prevent the butter layer from becoming too warm butter cool and to halt fermentation during the lamination process. While refrigeration is an option, ice blankets offer a convenient solution for quick chilling without the hassle of rearranging your fridge. Simply place them over the dough for a quick and efficient cool-down.
Selecting the Right Ingredients
Flour Choice:
You want to choose a flour that is strong enough and elastic enough to withstand the lamination but not so strong that it is difficult to roll out. Opt for a medium-strength, unbleached, unbromated flour, such as King Arthur's all-purpose flour. It is widely available and works well in our experience.
Butter Matters:
Butter is a vital ingredient, comprising nearly half of your dough's weight. A high butterfat content (82-86%) is preferable. Many butter brands do not list this information on the package, but European-style brands typically offer the higher fat needed for superior lamination. Brands like Organic Valley, Plugra, and Vermont Creamery have proven successful.
That said, butterfat percent alone is not the only factor determining how well a butter will work for lamination. How the butter is processed, and the milkfat crystal structure can make a particular butter more or less suited for lamination. Butter that has some pliability is ideal. Of course, nothing on the label will indicate this information, and it is simply a matter of trying different brands and seeing which butter performs the best.
It is possible to use other types of fats for lamination. Vegan croissants made with nondairy butter are just as deliciously flaky as their traditional counterparts.
The Lamination Process
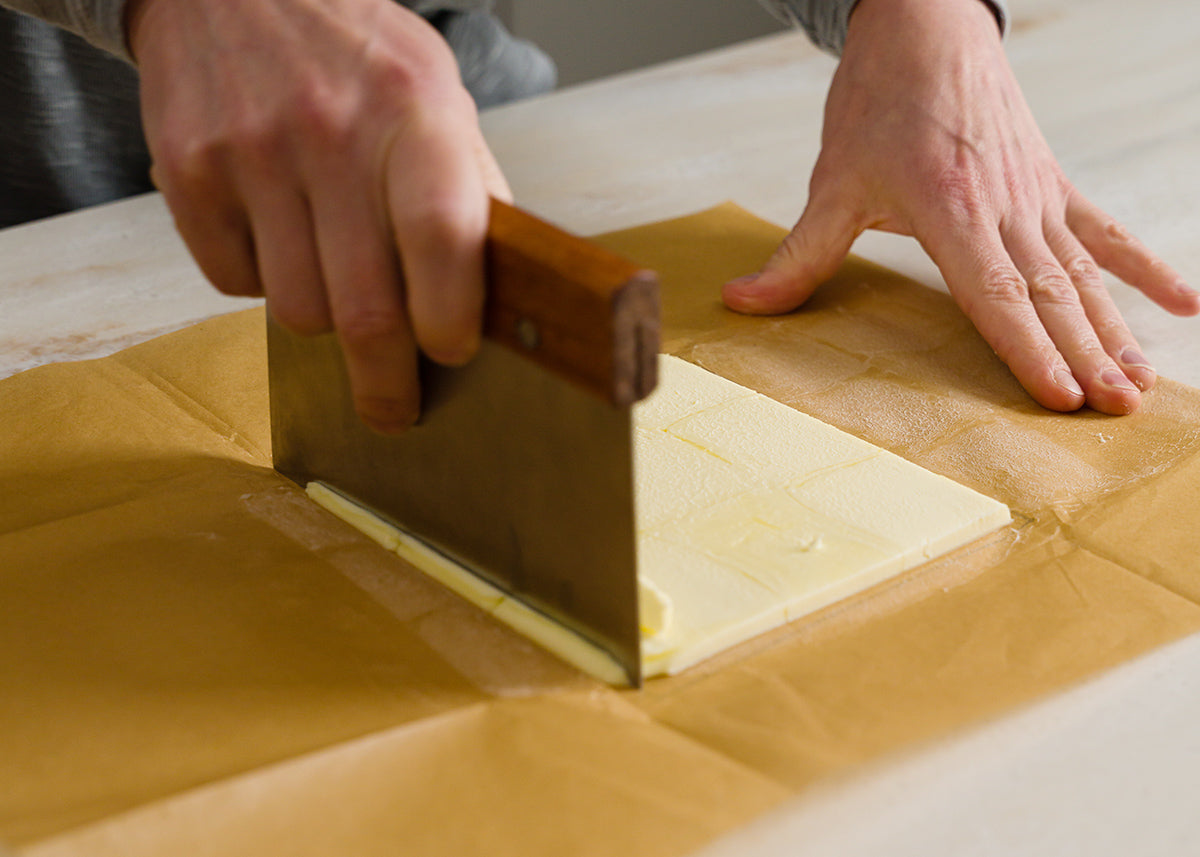
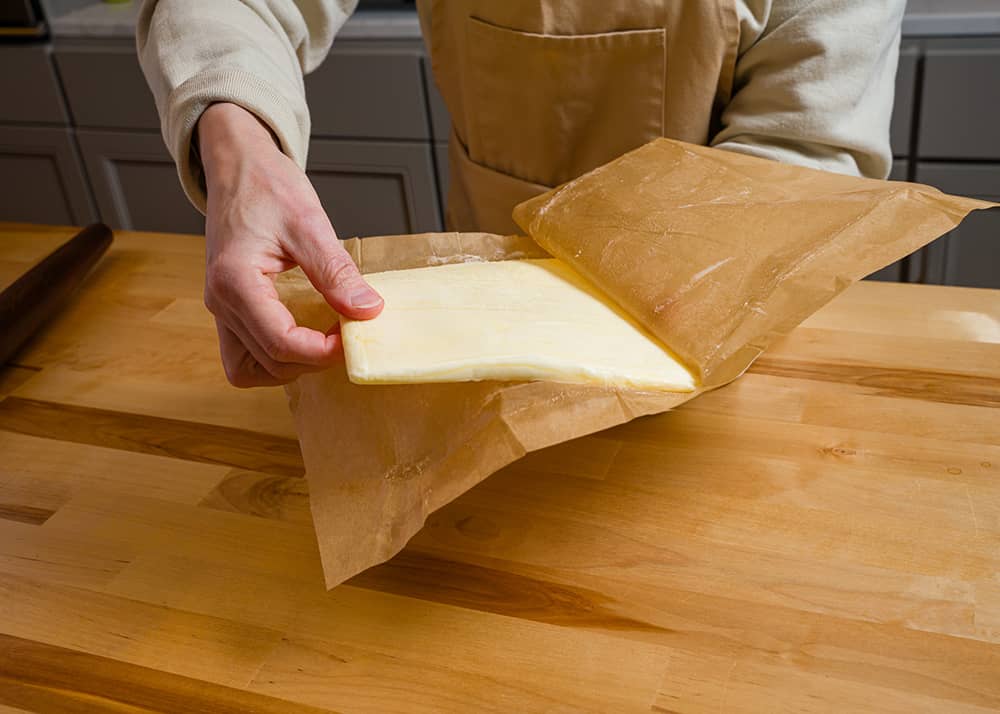
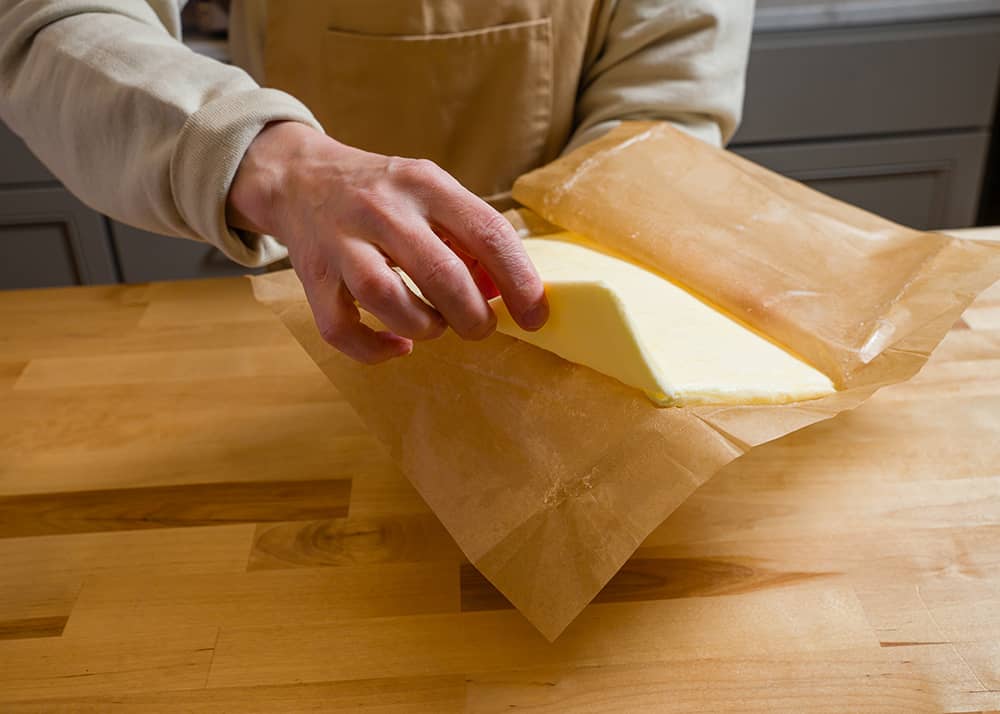
Crafting the Butter Block
A uniform butter block with straight sides and sharp edges is crucial for even distribution during lamination. Although seemingly a simple task, making the butter block can present some challenges.
Here are our best tips:
- Soften the Butter: Begin by slightly softening your butter so it's pliable but remains cold. This can be achieved by leaving sticks of butter out of the fridge for about 10-15 minutes.
- Shape the butter: Encase the butter between two pieces of parchment paper or heavy plastic wrap. Kitchen plastic wrap is too flimsy for this task and may tear easily, so ensure your material is sturdy enough to handle rolling. Keeping the material folded around the butter prevents leakage and helps maintain the desired shape. Use a rolling pin to gently yet firmly roll the butter into a flat square or rectangle.
- Chill: Refrigerate the shaped butter until it's firm but pliable, about 20-30 minutes. Keep the butter cool during handling to prevent melting.

Temperature Control
Successful lamination hinges on managing the dough and butter temperatures. You want them to be similar in texture, so they roll out together as one. Aim for a butter block temperature of 52 to 61°F (11 to 16°C), ensuring it's malleable but not overly soft. The dough will be slightly cooler, at 36 to 43°F (2 to 6°C).
Butter that’s too cold will crack into pieces and leave lumps throughout the dough, disrupting the layer formation. Conversely, butter that's too warm can absorb into the dough layers, resulting in a dense pastry lacking the desired flakiness. The ideal consistency for your butter block is clay-like–malleable and soft enough to bend without breaking, yet not greasy to the touch.
Managing temperature when working with laminating dough in a warm kitchen can be difficult, but it is not impossible. If necessary, utilize the refrigerator, freezer, or ice blankets to help cool the dough.
Minimal Flour Usage
When rolling, use just enough flour to prevent sticking, and always brush off excess before folding to avoid dryness and ensure proper layer adhesion. If not brushed off, it will prevent the dough from sticking to itself when folded and can create unsightly large gaps in the interior of your pastry once baked.
Even Rolling
When rolling, aim for uniform thickness and square edges to achieve the best layers. Achieving this consistency with a rolling pin is challenging; therefore, we suggest using a manual dough sheeter. It not only guarantees even thickness but also simplifies maintaining straight edges.
Patience and time
If the dough resists rolling, allow it to rest, tightly wrapped, in the refrigerator for 10 to 15 minutes to relax the gluten. This rest period helps relax the gluten, preserving the integrity of your layers. Forcibly rolling the dough can compromise the lamination by causing the dough to tear or the layer to compress.
Proofing Laminated Doughs
Proof your pastries between 75 to 78°F (24 to 26°C). This temperature range encourages the dough to rise without melting the butter layers. Humidity is important to help prevent the pastries from drying out and forming a skin, limiting expansion.
For that reason, we recommend using the water tray with the proofer. The pastries should appear noticeably larger, light, and visibly layered before baking. If you gently shake the pan, the pastries should wobble.
Mastering the art of lamination is a journey filled with rewarding milestones and nuanced techniques. With the right tools, quality ingredients, and a dose of patience, you can elevate your homemade pastries from good to extraordinary. Achieving flaky perfection depends not only on the recipe but also on mastering the technique and learning along the way. Are you ready to embark on this journey? Start with some of our favorite laminated recipes and experience the joy of baking, one flaky layer at a time.
Featured Recipes

Vegan Croissants
Croissants are often wrongly accused of being too difficult to make at home and impossible to make without butter. Forget what you’ve heard! Making these savory, flaky pastries without butter is not only do-able, vegan croissants are just as delicious as their dairy-based counterparts.

Boston Cream Cruffins
If you are a fan of Boston cream pie, then you will love Boston cream cruffins. They are buttery, flaky pastries filled with luscious vanilla custard and dipped in a rich chocolate ganache- the iconic American dessert in cruffin form.

Almond Croissants
The almond croissant is a delicious pastry made by baking a croissant twice. Bakeries traditionally used this technique to revive day-old croissants that would otherwise go to waste. Plain baked croissants are sliced in half, soaked in syrup, and filled with almond cream.


Leave a comment
2 comments
What type of ice blanket is recommended to keep the dough cool?
Raymond – I think the one we use is Cryopack, but any brand will work. You could even use a few bags of frozen vegetables in a pinch.